Introduction
Hello there, fellow bakers! Today I’m thrilled to share one of my absolute favorite dessert recipes – a Japanese Cotton Cheesecake that requires just 3 simple ingredients. Yes, you read that right – just THREE ingredients! This fluffy, cloud-like dessert has taken over social media for good reason: it’s incredibly simple to make yet looks and tastes like something from a high-end bakery.
I first discovered this recipe during my trip to Japan a few years ago. After coming back home, I spent months perfecting this simplified version that maintains the authentic jiggly, soufflé-like texture while being accessible to home bakers of all skill levels. The secret lies in the technique rather than a long list of ingredients, and I can’t wait to walk you through every step.
What Makes Japanese Cotton Cheesecake Special?
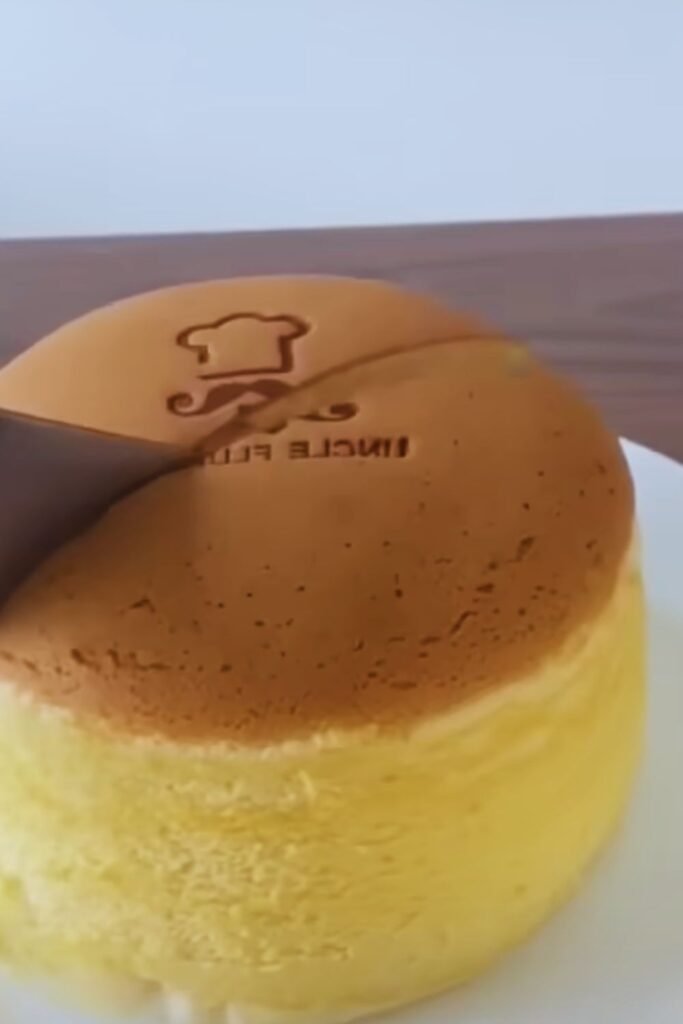
Japanese Cotton Cheesecake, also known as Japanese Soufflé Cheesecake, differs significantly from its American counterpart. While American cheesecakes are dense and creamy, Japanese versions are light, airy, and have an almost cloud-like texture that literally jiggles when you shake the plate!
The name “cotton” perfectly describes its texture – it’s as if someone managed to transform cotton candy into a cake form, while still maintaining a subtle cheesy flavor. It’s less sweet than Western cheesecakes and has a delicate flavor that pairs beautifully with tea or coffee.
The Magic 3 Ingredients
Before we dive into the recipe, let’s talk about these miraculous three ingredients that make this dessert possible:
- White Chocolate: 200g (7oz) high-quality white chocolate
- Eggs: 6 large eggs, separated
- Cream Cheese: 250g (8.8oz) full-fat cream cheese, at room temperature
That’s it! No flour, no added sugar (the white chocolate provides all the sweetness we need), and no additional flavorings required. Of course, you can add vanilla extract or lemon zest if you want, but trust me – this basic version is absolutely divine on its own.
Essential Equipment
While the ingredient list is minimal, you will need a few specific pieces of equipment:
- 8-inch (20cm) round cake pan with removable bottom
- Larger baking dish for water bath
- Stand mixer or electric hand mixer
- Parchment paper
- Aluminum foil
- Fine mesh sieve for smooth cream cheese
- Digital food thermometer (optional but helpful)
Step-by-Step Instructions
Preparation
- Preheat your oven to 320°F (160°C).
- Line the bottom and sides of your cake pan with parchment paper. Wrap the outside of the pan with aluminum foil to prevent water seepage during baking.
- Separate the eggs, placing whites in a large, clean bowl (make sure it’s completely free of grease) and yolks in a medium bowl.
Making the Batter
- Melt the chocolate: Create a double boiler by placing a heatproof bowl over a pot of simmering water. Add the white chocolate and stir occasionally until completely melted. Remove from heat.
- Prepare the cream cheese mixture:
- In a separate bowl, beat the cream cheese until smooth and lump-free.
- Gradually add the melted white chocolate to the cream cheese, mixing until well combined.
- Add the egg yolks one at a time, mixing well after each addition.
- If the mixture seems lumpy, pass it through a sieve for a silky-smooth texture.
- Beat the egg whites:
- Start beating the egg whites on low speed until foamy.
- Gradually increase the speed to medium-high and beat until stiff peaks form. You’ll know they’re ready when you can turn the bowl upside down and the whites don’t move!
- Combine the mixtures:
- Gently fold 1/3 of the beaten egg whites into the cream cheese mixture to lighten it.
- Carefully fold in the remaining egg whites in two batches, maintaining as much air as possible. The texture should be light and airy.
Baking
- Pour the batter into your prepared cake pan, smoothing the top with a spatula.
- Tap the pan gently on the counter a few times to remove large air bubbles.
- Place the cake pan in a larger baking dish and fill with hot water until it reaches about halfway up the sides of the cake pan. This water bath (bain-marie) creates steam in the oven, helping the cheesecake bake gently and evenly.
- Bake for 60-70 minutes, or until the top is golden brown and the cake jiggles slightly when gently shaken. The internal temperature should reach around 155°F (68°C) if you’re using a thermometer.
- Turn off the oven, crack the door open slightly, and let the cake cool in the oven for about 1 hour. This gradual cooling helps prevent the cake from deflating dramatically.
Pro Tips for Perfect Japanese Cotton Cheesecake
- Room temperature ingredients: For the smoothest batter, make sure your cream cheese is at room temperature.
- Gentle folding: When combining the egg whites with the cream cheese mixture, use a gentle folding motion to maintain as much air as possible.
- Proper water bath: Make sure your aluminum foil creates a watertight seal around the cake pan to prevent any water from seeping in.
- No sudden temperature changes: Avoid opening the oven door during baking, as temperature fluctuations can cause the cake to collapse.
- Patience is key: Resist the urge to rush the cooling process. The gradual cooling in the turned-off oven helps maintain the cake’s structure.
Common Mistakes to Avoid
| Mistake | Consequence | Solution |
|---|---|---|
| Overbeating egg whites | Dry, grainy texture | Beat only until stiff peaks form, not beyond |
| Undermixing cream cheese | Lumpy batter | Mix until completely smooth or pass through sieve |
| Opening oven during baking | Cake may collapse | Resist the temptation to peek! |
| Skipping the water bath | Uneven baking, cracks on surface | Always use a water bath for gentle, even heat |
| Removing cake too soon | Dramatic collapse | Cool gradually in the oven with door ajar |
| Using cold ingredients | Lumpy batter, poor rise | Bring cream cheese to room temperature |
| Greasy bowl for egg whites | Whites won’t whip properly | Ensure bowl is completely clean and dry |
Troubleshooting
| Issue | Possible Cause | How to Fix |
|---|---|---|
| Cake cracked on top | Oven too hot | Lower temperature by 10°F next time |
| Cake collapsed completely | Underbaked or cooled too quickly | Bake longer and cool more gradually |
| Cake too dense | Egg whites deflated | Fold more gently, don’t overmix |
| Cake soggy at bottom | Water seeped into pan | Double-wrap with foil next time |
| Cake didn’t rise much | Egg whites not beaten enough | Beat until stiff peaks form |
| Bottom burnt | Pan too close to heat source | Place rack in middle of oven |
| Cake tastes eggy | Egg yolks not well incorporated | Mix yolks thoroughly before folding |
Serving Suggestions
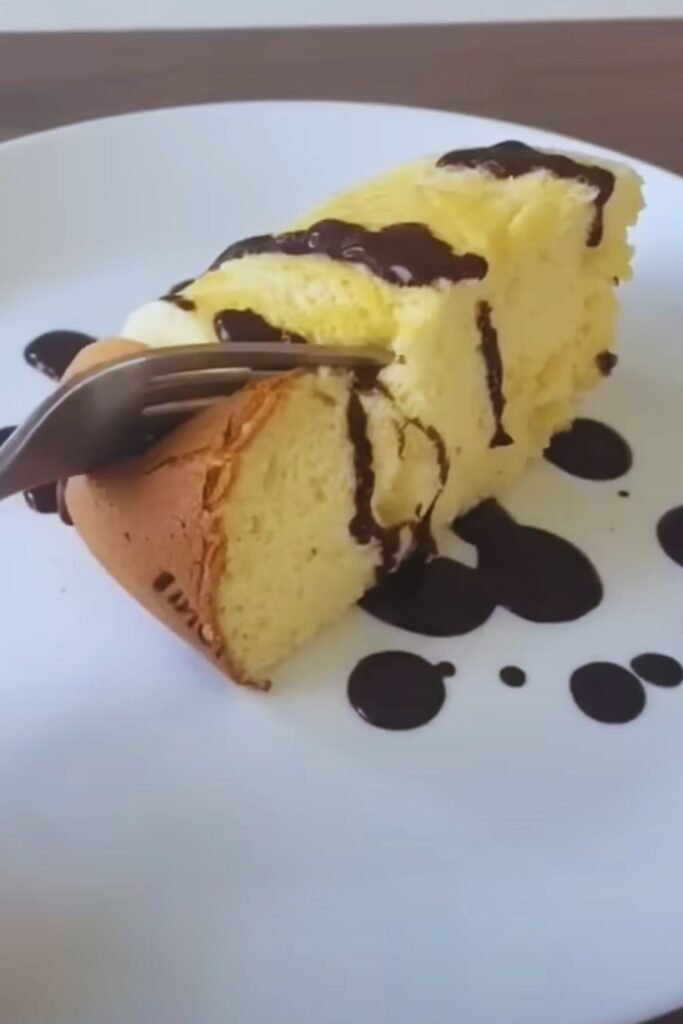
Japanese Cotton Cheesecake is traditionally served plain or with a light dusting of powdered sugar. This allows its delicate flavor and unique texture to shine. However, here are some delicious ways I like to serve it:
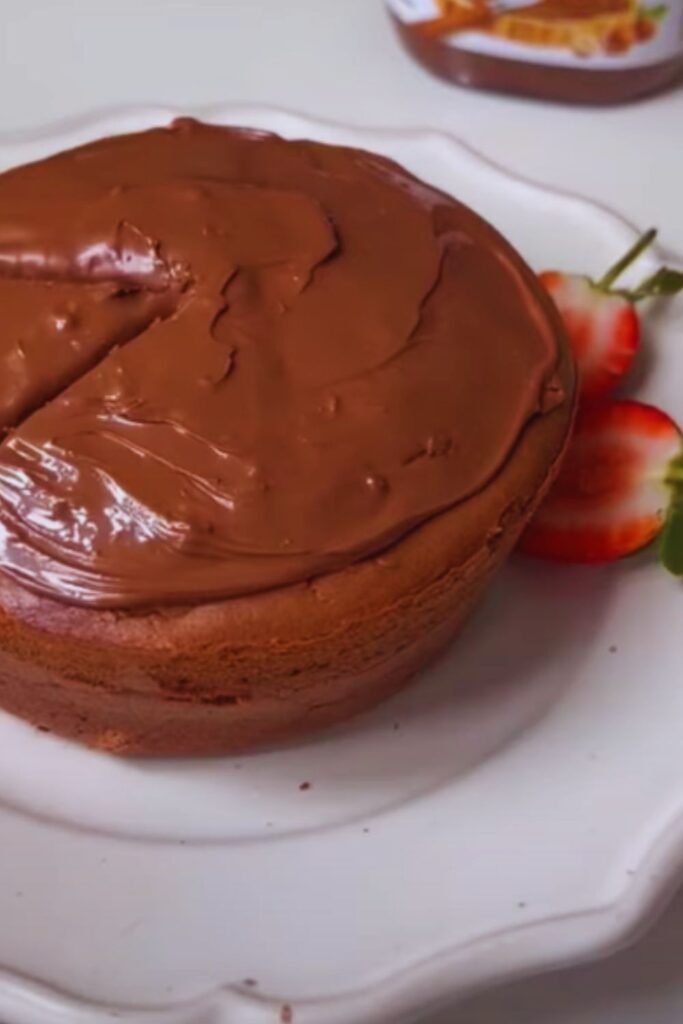
- Fresh berries: A handful of fresh strawberries, blueberries, or raspberries adds color and a touch of tartness.
- Fruit compote: A light berry or peach compote makes a lovely accompaniment without overwhelming the cake.
- Matcha dusting: Replace powdered sugar with a light dusting of matcha powder for a Japanese-inspired twist.
- Whipped cream: A small dollop of lightly sweetened whipped cream works beautifully.
- Citrus zest: A sprinkle of lemon or orange zest brightens the flavor profile.
- Honey drizzle: A very light drizzle of quality honey adds subtle sweetness.
- Tea pairing: Serve with a cup of hojicha, genmaicha, or Earl Grey tea for a perfect afternoon treat.
Storage Tips
To maintain the cake’s texture and flavor, follow these storage guidelines:
- Room temperature: The cake can be kept at room temperature for up to 2 hours.
- Refrigeration: Store in an airtight container in the refrigerator for up to 3 days. The texture will become slightly more dense when chilled.
- Freezing: While possible, freezing isn’t ideal as it can affect the delicate texture. If you must freeze, wrap individual slices tightly in plastic wrap and freeze for up to 1 month. Thaw overnight in the refrigerator.
- Serving after refrigeration: For the best experience, let refrigerated cake come to room temperature for about 30 minutes before serving to restore some of its delicate texture.
Variations on the Basic Recipe
While the 3-ingredient version is amazingly simple, here are some variations if you want to experiment:
Chocolate Version
- Replace white chocolate with dark or milk chocolate
- Add 1 tablespoon of cocoa powder to the batter
Matcha Variation
- Add 1-2 tablespoons of high-quality matcha powder to the cream cheese mixture
- Reduce white chocolate to 180g to account for matcha’s bitterness
Citrus Infusion
- Add the zest of one lemon or orange to the cream cheese mixture
- Consider adding 1-2 teaspoons of juice for extra flavor
Vanilla Bean
- Scrape seeds from one vanilla bean into the cream cheese mixture
- Enhance with a teaspoon of vanilla extract if desired
The Science Behind the Magic
What makes this cake so special with just three ingredients? It’s all about the technique and the perfect ratio of ingredients:
- The role of egg whites: When beaten to stiff peaks, egg whites create a stable foam structure with tiny air bubbles. This gives the cake its signature lightness and jiggly texture.
- White chocolate magic: White chocolate provides not just sweetness, but also fat and milk solids that contribute to structure and flavor. The cocoa butter in white chocolate adds richness without heaviness.
- Cream cheese foundation: Unlike traditional cheesecakes that use large amounts of cream cheese for density, this recipe uses just enough to provide the signature tangy flavor while letting the egg whites create the texture.
- Water bath baking: The gentle, moist heat ensures even baking and helps maintain the delicate structure created by the egg whites.
Nutritional Information
While this is certainly a treat, it’s actually lighter than traditional cheesecake. Here’s the approximate nutritional breakdown per slice (assuming 8 slices per cake):
| Nutrient | Amount per Slice |
|---|---|
| Calories | 290 |
| Protein | 7g |
| Fat | 22g |
| Carbohydrates | 18g |
| Sugar | 16g |
| Sodium | 180mg |
| Calcium | 15% DV |
| Vitamin A | 12% DV |
My Personal Journey with This Recipe
I still remember my first attempt at making this cake – it was a complete disaster! I rushed the process, didn’t beat the egg whites properly, and ended up with something closer to a pancake than a fluffy cheesecake. After several more attempts and many hours watching Japanese baking videos, I finally cracked the code to the perfect 3-ingredient version.
What I love most about this recipe is how impressive the results are despite the simplicity. I’ve served this at dinner parties where guests absolutely refused to believe it contained only three ingredients! It’s become my signature dessert, the one friends always request when I offer to bring something sweet.
FAQ Section
Q: Can I use milk chocolate instead of white chocolate?
A: Yes, you can use milk chocolate, but the flavor and color will change. The cake will be tan rather than white and have a more traditional chocolate flavor.
Q: Why did my cake collapse after baking?
A: The most common reasons are opening the oven door during baking, underbaking, or cooling too quickly. Remember to let it cool gradually in the turned-off oven with the door slightly ajar.
Q: Can I make this in a regular cake pan without a removable bottom?
A: While possible, it’s much more difficult to remove the cake without damaging it. If using a regular pan, line it extremely well with parchment paper, including “handles” that extend above the sides.
Q: My cake cracked on top – what happened?
A: Cracking usually occurs when the oven temperature is too high or when the cake is placed too close to the top heating element. Try lowering your oven temperature by 10°F next time.
Q: Can I make mini versions in a muffin tin?
A: Absolutely! Reduce the baking time to about 25-30 minutes. You’ll still need a water bath, which can be tricky with a muffin tin – try placing the muffin tin in a larger roasting pan filled with hot water.
Q: Is this cake gluten-free?
A: Yes, this basic recipe is naturally gluten-free! Just double-check your white chocolate ingredients to make sure there are no gluten-containing additives.
Q: Can I make this cake without an electric mixer?
A: While technically possible to whip egg whites by hand, it’s extremely difficult to achieve stiff peaks without an electric mixer. I strongly recommend using at least a hand mixer for this recipe.
Q: How do I know when the cake is done baking?
A: The cake should be golden brown on top and jiggle slightly (but not slosh) when gently shaken. If using a thermometer, the internal temperature should reach around 155°F (68°C).
Conclusion
This 3-ingredient Japanese Cotton Cheesecake truly represents why I love baking – sometimes the simplest recipes yield the most magical results. The combination of light, airy texture with a subtle cheese flavor creates an unforgettable dessert experience that’s both sophisticated and comforting.
What I find most beautiful about this recipe is how it transforms basic ingredients into something that looks and tastes complex. It’s a wonderful reminder that baking is as much about technique and patience as it is about ingredients.
Whether you’re looking to impress guests at a dinner party or simply treat yourself to something special, this cheesecake delivers every time. The moment you cut into it and reveal that perfect cotton-like texture, you’ll understand why it’s worth every minute spent making it.
So go ahead, gather your three ingredients, and embark on this delightful baking adventure. I promise the results will bring smiles all around. And if you try this recipe, I’d love to hear how it turned out for you!
Happy baking!