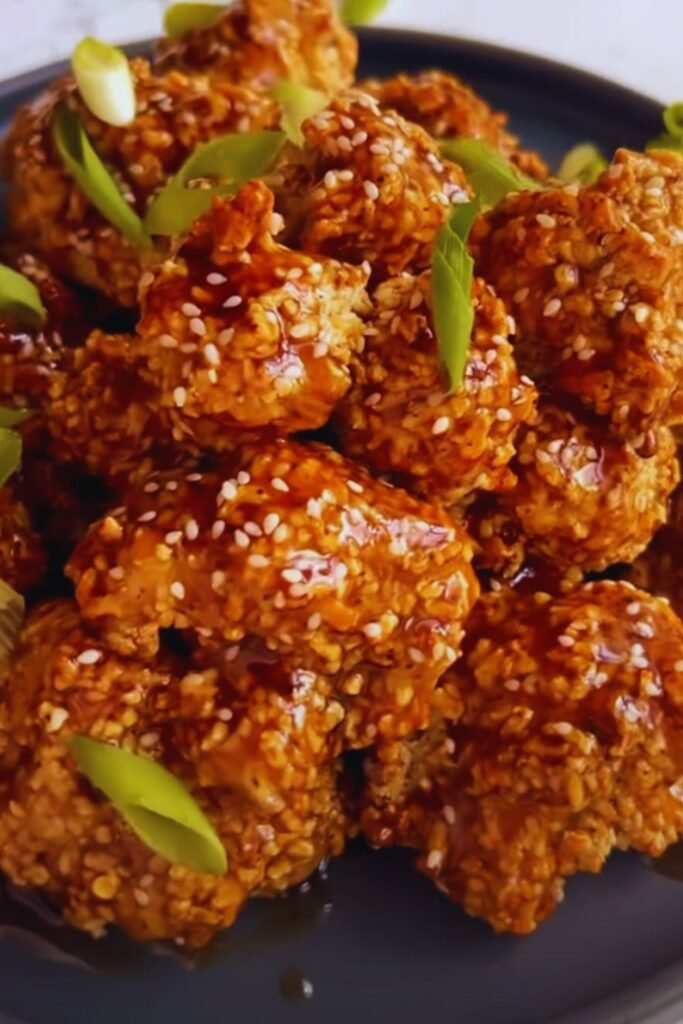
Have you ever craved that sweet-and-sticky takeout experience but wanted something a little lighter? I’ve been there too! After years of experimenting with plant-based alternatives to my favorite Chinese restaurant dishes, I’ve perfected this Sticky Sesame Cauliflower recipe that delivers all the flavor without the guilt. The tender cauliflower florets get a crispy coating before being tossed in a glossy, umami-packed sauce that will have you licking your fingers (and probably the plate too!).
This dish transforms humble cauliflower into an irresistible main that even dedicated meat-eaters will devour. Trust me—I’ve converted many skeptics with this recipe! The best part? It comes together in under 45 minutes, making it perfect for busy weeknights when takeout temptation is strongest.
Why You’ll Love This Recipe
I know what you’re thinking—can cauliflower really satisfy those takeout cravings? The answer is a resounding yes! Here’s why this recipe deserves a spot in your regular rotation:
- Healthier alternative: Significantly less oil and sugar than restaurant versions
- Versatile: Works as an appetizer, side dish, or main course
- Crowd-pleaser: Appeals to vegans, vegetarians, and omnivores alike
- Adaptable heat level: Easily adjustable to your spice preference
- Make-ahead friendly: Components can be prepared in advance
- Budget-friendly: Costs a fraction of restaurant takeout
Ingredients You’ll Need
For a dish this flavorful, you might expect a lengthy ingredient list, but I’ve streamlined it to focus on pantry staples you likely already have, plus a few Asian ingredients worth adding to your collection.
For the Crispy Cauliflower
- 1 large head cauliflower (about 2 pounds)
- 1 cup all-purpose flour (or gluten-free alternative)
- 2 tablespoons cornstarch
- 1 teaspoon garlic powder
- ½ teaspoon salt
- ¼ teaspoon black pepper
- 1 cup cold water
- 2 tablespoons neutral oil (like avocado or canola)
For the Sticky Sesame Sauce
- ⅓ cup low-sodium tamari or soy sauce
- 3 tablespoons rice vinegar
- 3 tablespoons maple syrup or honey
- 2 tablespoons tomato paste
- 1 tablespoon toasted sesame oil
- 1 tablespoon grated fresh ginger
- 3 garlic cloves, minced
- 1-2 teaspoons sriracha or chili garlic sauce (optional)
- 2 tablespoons cornstarch
- ¼ cup water
For Serving
- 2 tablespoons toasted sesame seeds
- 3 green onions, thinly sliced
- Steamed rice
- Steamed broccoli or bok choy
Nutritional Information
Before diving into the cooking process, let’s take a look at what makes this dish a nutritional winner compared to traditional takeout options:
| Nutrient | Amount per Serving | % Daily Value |
|---|---|---|
| Calories | 285 | – |
| Total Fat | 9g | 12% |
| Saturated Fat | 1g | 5% |
| Cholesterol | 0mg | 0% |
| Sodium | 680mg | 29% |
| Total Carbohydrate | 46g | 17% |
| Dietary Fiber | 6g | 21% |
| Total Sugars | 14g | – |
| Protein | 9g | 18% |
| Vitamin D | 0mcg | 0% |
| Calcium | 88mg | 7% |
| Iron | 3mg | 17% |
| Potassium | 686mg | 15% |
Based on a 2,000 calorie diet. Serving size: ¼ of recipe.
Equipment Needed
I believe in keeping things simple in the kitchen, so you won’t need any specialized tools for this recipe:
- Baking sheet
- Parchment paper or silicone mat
- Mixing bowls (2 medium, 1 small)
- Whisk
- Sharp knife
- Cutting board
- Medium saucepan
- Measuring cups and spoons
- Tongs or slotted spoon
Step-by-Step Instructions
Preparing the Cauliflower
- Preheat your oven to 425°F (220°C) and line a large baking sheet with parchment paper.
- Remove the leaves from the cauliflower and cut the head into bite-sized florets, trying to keep them relatively uniform in size for even cooking.
- In a medium bowl, whisk together the flour, cornstarch, garlic powder, salt, and pepper.
- Gradually add the cold water and oil, whisking until smooth. The batter should be thick enough to coat the back of a spoon but still drip off slowly.
- Dip each cauliflower floret into the batter, allowing excess to drip off, then place on the prepared baking sheet, leaving space between pieces.
- Bake for 20 minutes, then flip the florets and bake for another 10 minutes until golden and crispy on the outside.
Making the Sticky Sesame Sauce
While the cauliflower is baking, prepare your sauce:
- In a medium saucepan, combine the tamari/soy sauce, rice vinegar, maple syrup, tomato paste, sesame oil, ginger, garlic, and sriracha (if using).
- Bring the mixture to a simmer over medium heat, stirring occasionally.
- In a small bowl, whisk together the cornstarch and water to create a slurry.
- Once the sauce is simmering, slowly pour in the cornstarch slurry while whisking constantly.
- Continue to cook, stirring frequently, until the sauce thickens enough to coat the back of a spoon, about 2-3 minutes.
- Remove from heat and set aside.
Bringing It All Together
- When the cauliflower is done baking, transfer the crispy florets to a large bowl.
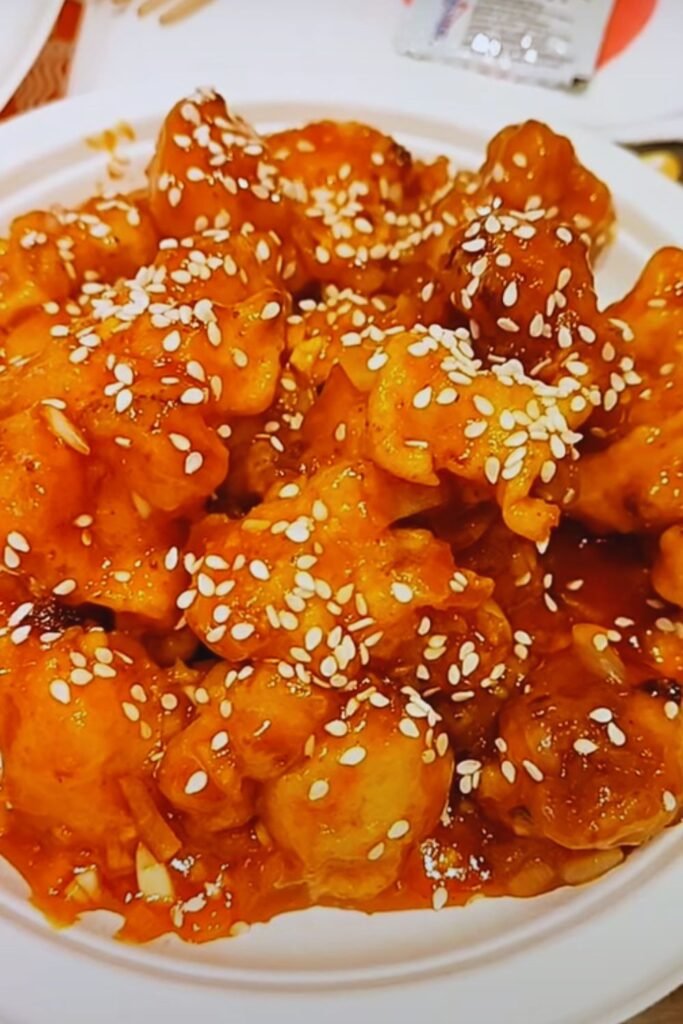
- Pour the warm sticky sesame sauce over the cauliflower and gently toss until all pieces are thoroughly coated.
- Return the coated cauliflower to the baking sheet and bake for an additional 5-7 minutes, until the sauce is bubbling and slightly caramelized.
- Remove from the oven and sprinkle with toasted sesame seeds and sliced green onions.
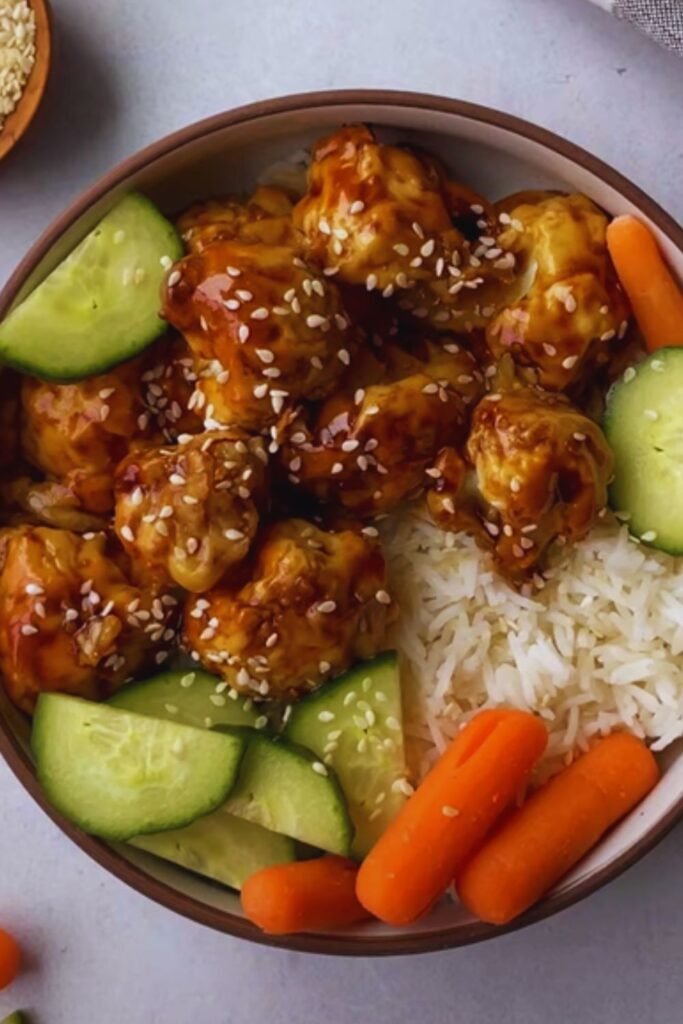
- Serve immediately over steamed rice with your choice of vegetables on the side.
Pro Tips for Perfect Sticky Sesame Cauliflower
Over the years, I’ve discovered several tricks that elevate this dish from good to absolutely irresistible:
- Don’t overcrowd the baking sheet: Give each cauliflower floret some breathing room to ensure they crisp up properly rather than steam.
- Make the batter just before using: This prevents it from becoming too thick and ensures optimal crispiness.
- Adjust the sauce consistency: If your sauce gets too thick, add a splash of water; if too thin, simmer a bit longer.
- Double the sauce recipe: The sauce is so delicious you might want extra for drizzling over rice or vegetables.
- Toast your sesame seeds: A quick toast in a dry pan intensifies their nutty flavor tremendously.
- Serve immediately: The cauliflower is at its crispiest right after the final bake.
Common Problems and Solutions
| Problem | Possible Cause | Solution |
|---|---|---|
| Cauliflower not crispy | Overcrowded baking sheet | Use two baking sheets if necessary |
| Oven temperature too low | Check your oven with a thermometer | |
| Too much batter | Shake off excess before baking | |
| Sauce too thin | Not enough cornstarch | Add additional cornstarch slurry (½ tsp cornstarch + 1 tbsp water) |
| Not simmered long enough | Continue cooking until desired thickness | |
| Sauce too thick | Too much cornstarch | Add water, 1 tablespoon at a time |
| Cooked too long | Thin with a splash of water or broth | |
| Sauce too salty | Too much tamari/soy sauce | Balance with additional maple syrup and rice vinegar |
| Used regular instead of low-sodium soy sauce | Dilute with a bit of water and add more sweetener | |
| Not enough sauce | Recipe variation | Double the sauce recipe next time |
Variations to Try
One of the reasons I love this recipe is its versatility. Here are some delicious variations I’ve tried and loved:
Spicy Sesame Cauliflower
Add 1-2 tablespoons of gochujang (Korean chili paste) to the sauce for a spicy Korean-inspired twist.
Orange Sesame Cauliflower
Replace half the water in the sauce with fresh orange juice and add 1 tablespoon of orange zest for a citrusy variation reminiscent of Orange Chicken.
Honey Garlic Cauliflower
Increase the garlic to 5-6 cloves, replace the maple syrup with honey, and reduce the tamari/soy sauce to 2 tablespoons for a different flavor profile.
Air Fryer Method
If you have an air fryer, you can cook the battered cauliflower at 375°F (190°C) for about 12-15 minutes, shaking the basket halfway through. This creates an extra crispy result with less oil.
Gluten-Free Option
Replace all-purpose flour with a gluten-free blend and ensure you’re using tamari or certified gluten-free soy sauce.
Make-Ahead and Storage Information
Life gets busy, and I’m all about recipes that can fit into a hectic schedule. Here’s how to make components ahead and store leftovers:
Make-Ahead Options
- Cauliflower florets: Can be cut up to 3 days in advance and stored in an airtight container in the refrigerator.
- Dry ingredients: Can be mixed and stored at room temperature for up to 1 month.
- Sauce: Can be prepared up to 5 days ahead and stored in the refrigerator. Reheat gently before using.
Storage Instructions
- Refrigerator: Store leftovers in an airtight container for up to 3 days. The cauliflower will lose its crispiness but will still be delicious.
- Freezer: Not recommended as the texture becomes soggy when thawed.
Reheating Tips
- Oven: For the best texture, reheat at 375°F (190°C) for 10-15 minutes.
- Microwave: Quick but will result in softer cauliflower. Heat in 30-second intervals until warmed through.
- Air fryer: Reheat at 350°F (175°C) for 3-5 minutes for the crispiest results.
Serving Suggestions

This sticky sesame cauliflower is incredibly versatile when it comes to serving options. Here are my favorite ways to enjoy it:
Complete Meal Ideas
- Serve over jasmine or brown rice with steamed broccoli for a balanced plate
- Pair with quinoa and a simple Asian cucumber salad
- Serve alongside vegetable fried rice for a takeout-style feast
- Use as a protein component in a Buddha bowl with edamame, avocado, and pickled vegetables
Accompaniments That Pair Well
- Fresh cucumber slices tossed with rice vinegar and a pinch of salt
- Simple miso soup
- Kimchi for a spicy, fermented side
- Steamed or stir-fried bok choy with garlic
- Quick-pickled red onions and carrots
Garnish Options
Beyond the sesame seeds and green onions, consider:
- Thinly sliced fresh chilies for heat
- Crushed peanuts for extra crunch
- Fresh cilantro leaves
- Lime wedges for a bright finish
- Furikake (Japanese seasoning blend)
Health Benefits of Key Ingredients
As someone who believes in the power of food as medicine, I appreciate how this dish incorporates several nutritionally powerful ingredients:
Cauliflower
This cruciferous vegetable is packed with:
- Vitamin C for immune support
- Vitamin K for bone health
- Fiber for digestive health
- Antioxidants that help reduce inflammation
- Choline, which is essential for brain health
Sesame Seeds
These tiny powerhouses offer:
- Healthy fats including omega-3 and omega-6
- Calcium and magnesium for bone health
- Zinc for immune function
- Iron for healthy blood
- Antioxidants including sesamin and sesamolin
Ginger
This flavorful root brings:
- Natural anti-inflammatory properties
- Digestive support
- Immune-boosting compounds
- Potential nausea relief
- Antioxidants that fight oxidative stress
Frequently Asked Questions
I’ve received many questions about this recipe over the years. Here are answers to the most common ones:
Q: Can I make this recipe without cornstarch? Yes! Arrowroot powder works well as a 1:1 substitute. For the batter, you can use all flour if you don’t have cornstarch available.
Q: How can I make this recipe oil-free? You can omit the oil in the batter and use parchment paper or a silicone mat to prevent sticking. The texture won’t be quite as crispy, but it’s still delicious. For the sauce, the sesame oil adds significant flavor, but you can reduce it to 1 teaspoon if desired.
Q: Is there a way to reduce the sodium content? Absolutely. Use low-sodium tamari or soy sauce and reduce the amount to ¼ cup, making up the difference with vegetable broth. You can also reduce the salt in the batter.
Q: Can I use frozen cauliflower? Fresh works best for optimal texture, but if frozen is what you have, thaw it completely and pat it very dry before battering. You may need to increase the baking time by 5-10 minutes.
Q: What can I substitute for maple syrup? Honey works wonderfully if you’re not vegan. Other options include agave nectar, brown sugar dissolved in a bit of water, or even date syrup.
Q: My sauce didn’t thicken properly. What went wrong? The most common issue is that the sauce wasn’t hot enough when adding the cornstarch slurry. Make sure it’s simmering. Also, be sure to mix your cornstarch and water thoroughly before adding to avoid lumps.
Q: Can I make this in advance for a party? I recommend making the components ahead (sauce and battered cauliflower) but combining and doing the final bake just before serving for the best texture.
Q: How spicy is this recipe? As written with just 1 teaspoon of sriracha, it’s very mild. You can easily adjust the heat level by adding more sriracha, chili garlic sauce, or even fresh chilies to taste.
Personal Insights

I first created this recipe when trying to satisfy both my Chinese takeout cravings and my desire to incorporate more plant-based meals into my diet. What started as an experiment has become one of my most requested dishes when entertaining.
I’ve served this sticky sesame cauliflower to lifelong vegetarians and dedicated carnivores alike, and it never fails to impress. There’s something magical about the combination of textures—crispy exterior, tender interior, and that glossy, flavor-packed sauce that clings to every bite.
My favorite moment is always watching someone who claims not to like cauliflower take that reluctant first bite, followed by genuine surprise and delight as they reach for seconds (and sometimes thirds!).
While I love all versions of this recipe, I have a special fondness for the spicy variation with gochujang. The complex heat it brings elevates the dish to new heights, especially when paired with a cold, crisp cucumber salad for contrast.
Don’t be surprised if this becomes your new favorite way to enjoy cauliflower—I’m constantly getting text messages from friends asking for the recipe after they’ve tried it at my table. It’s that good!
A Final Note
Cooking should be an adventure, not a rigid set of rules. While I’ve provided detailed instructions, I encourage you to trust your instincts and adjust seasonings to your preference. Maybe you’ll discover a variation that becomes your signature version!
Remember that the key to the best sticky sesame cauliflower is balance—sweet, savory, tangy, and a touch of heat, all working together to transform a humble vegetable into something truly special.
I’d love to hear how this recipe turns out for you and any creative twists you might add to make it your own. Happy cooking!