Valentine’s Day is approaching, and I’ve been thinking about ways to make the celebration a little sweeter this year. There’s something about homemade desserts that feels more personal and heartfelt than store-bought treats. After years of experimenting with Valentine’s Day recipes, I’ve gathered some of my absolute favorites that strike the perfect balance between impressive and achievable.
I’ve always believed that the most memorable Valentine’s gifts come from the heart, not necessarily the wallet. Whether you’re celebrating with a romantic partner, gathering with friends for a “Galentine’s” celebration, or simply treating yourself (which I highly recommend), these desserts will make the day feel special without requiring professional baking skills.
From rich chocolate indulgences to fruity delights with romantic hues, I’ve included options to satisfy different palates and dietary needs. Each recipe has been tested multiple times in my own kitchen, often with my less-than-patient family eagerly waiting by the oven door. The recipes range from quick 30-minute treats to slightly more involved creations, but none require specialized equipment or impossible-to-find ingredients.
So put on your favorite playlist, tie on an apron, and let’s create some Valentine’s Day magic in the kitchen!
Matcha Crinkle Cookies
When I first encountered matcha in desserts, I was skeptical. The earthy, slightly bitter green tea powder seemed like an odd choice for sweets. But after my first bite of these matcha crinkle cookies, I was completely converted. The beautiful green color makes them visually striking for Valentine’s Day, especially when paired with red or pink treats on a dessert table.
Ingredients:
- 2 cups all-purpose flour
- 2 tablespoons high-quality matcha powder
- 1 teaspoon baking powder
- ½ teaspoon salt
- ¾ cup unsalted butter, softened
- 1 cup granulated sugar
- 2 large eggs
- 1 teaspoon vanilla extract
- ½ cup powdered sugar (for coating)
Instructions:
- In a medium bowl, whisk together the flour, matcha powder, baking powder, and salt.
- In a separate large bowl, beat the butter and granulated sugar with an electric mixer until light and fluffy, about 3 minutes.
- Add eggs one at a time, beating well after each addition. Mix in the vanilla extract.
- Gradually add the flour mixture to the butter mixture, mixing until just combined.
- Cover the dough and refrigerate for at least 2 hours, or overnight for best results.
- When ready to bake, preheat the oven to 350°F (175°C) and line baking sheets with parchment paper.
- Place the powdered sugar in a shallow bowl.
- Roll the chilled dough into 1-inch balls, then roll each ball in powdered sugar to coat generously.
- Place the coated dough balls on the prepared baking sheets, spacing them about 2 inches apart.
- Bake for 10-12 minutes, until the cookies are set but still slightly soft in the center.
- Allow the cookies to cool on the baking sheets for 5 minutes before transferring to wire racks to cool completely.
These matcha crinkle cookies offer a sophisticated flavor profile that balances sweetness with the unique taste of green tea. The crackled, sugar-dusted appearance makes them as beautiful as they are delicious. I find they pair wonderfully with a cup of hot chocolate or coffee for a cozy Valentine’s evening.
Red Velvet Cheesecake Brownies

Red velvet and Valentine’s Day are a match made in heaven. The first time I made these brownies, my partner declared them “dangerously good,” and proceeded to eat three in one sitting. The striking red color against the creamy white cheesecake swirl creates a romantic visual effect, while the combination of flavors—rich chocolate, tangy cream cheese, and subtle vanilla—is absolutely divine.
Ingredients:
For the red velvet layer:
- ½ cup unsalted butter, melted
- 1 cup granulated sugar
- 2 large eggs
- 2 teaspoons vanilla extract
- 1 tablespoon red food coloring
- 2 tablespoons cocoa powder
- ¾ cup all-purpose flour
- ¼ teaspoon salt
For the cheesecake layer:
- 8 oz cream cheese, softened
- ¼ cup granulated sugar
- 1 large egg
- 1 teaspoon vanilla extract
Instructions:
- Preheat your oven to 350°F (175°C) and line an 8×8 inch baking pan with parchment paper.
- For the red velvet layer: In a large bowl, mix the melted butter and sugar until well combined.
- Add the eggs one at a time, mixing well after each addition.
- Stir in the vanilla extract and red food coloring.
- In a separate bowl, whisk together the cocoa powder, flour, and salt.
- Gradually add the dry ingredients to the wet ingredients, mixing until just combined.
- For the cheesecake layer: In a medium bowl, beat the cream cheese and sugar until smooth and creamy.
- Add the egg and vanilla extract, beating until well incorporated.
- Pour about ¾ of the red velvet batter into the prepared pan, spreading it evenly.
- Spoon the cheesecake mixture over the red velvet layer.
- Drop the remaining red velvet batter by spoonfuls over the cheesecake layer.
- Use a knife or skewer to swirl the two batters together, creating a marbled effect.
- Bake for 30-35 minutes, or until a toothpick inserted in the center comes out with a few moist crumbs.
- Allow to cool completely in the pan before cutting into squares.
I’ve found that chilling these brownies in the refrigerator for at least an hour before serving intensifies the flavors and makes them easier to cut cleanly. They’re perfect for gifting to your Valentine in a pretty box, or serving as the grand finale to a romantic dinner.
Raspberry White Chocolate Mousse Cups

Elegant and surprisingly simple, these mousse cups never fail to impress. The combination of tart raspberries and sweet white chocolate creates a balanced flavor profile that’s light yet satisfying. I discovered this recipe when planning a dinner party years ago and needed a make-ahead dessert that would still wow my guests. It’s now one of my go-to Valentine’s Day recipes when I want something that looks fancy without requiring hours in the kitchen.
Ingredients:
- 2 cups fresh raspberries, plus extra for garnish
- ¼ cup granulated sugar
- 1 tablespoon lemon juice
- 2 teaspoons unflavored gelatin
- 3 tablespoons cold water
- 8 oz white chocolate, chopped
- 1 ½ cups heavy cream
- ½ teaspoon vanilla extract
- Heart-shaped cookies or chocolate pieces (optional, for garnish)
Instructions:
- In a small saucepan, combine 1 ½ cups raspberries, sugar, and lemon juice. Cook over medium heat until raspberries break down and the mixture becomes syrupy, about 5 minutes.
- Press the raspberry mixture through a fine-mesh sieve to remove seeds. Set aside to cool.
- In a small bowl, sprinkle the gelatin over the cold water and let stand for 5 minutes to soften.
- Heat the gelatin mixture in the microwave for 10 seconds, or until melted. Stir into the cooled raspberry puree.
- In a heatproof bowl set over simmering water (or in the microwave), melt the white chocolate, stirring until smooth. Allow to cool slightly.
- In a large bowl, whip 1 cup of the heavy cream until stiff peaks form.
- Fold the melted white chocolate into the whipped cream until well incorporated.
- Gently fold in the raspberry puree, creating a marbled effect (don’t overmix if you want to maintain the swirled appearance).
- Spoon or pipe the mousse into serving glasses or cups.
- Refrigerate for at least 3 hours, or overnight.
- Before serving, whip the remaining ½ cup heavy cream with vanilla extract until soft peaks form.
- Top each mousse cup with a dollop of whipped cream, fresh raspberries, and a heart-shaped cookie or chocolate piece if desired.
What I love about this dessert is its versatility. You can serve it in elegant stemmed glasses for a formal presentation, or in small mason jars for a more rustic look. The vibrant pink color makes it perfect for Valentine’s Day without seeming cliché.
Chocolate Lava Cakes for Two

There’s something undeniably romantic about cutting into a warm chocolate cake and watching the molten center flow out. Despite their impressive appearance, these lava cakes require minimal effort and few ingredients. The first time I made them, I was genuinely shocked at how easy they were—and how quickly they disappeared from our plates!
Ingredients:
- 4 oz semisweet or bittersweet chocolate, chopped
- ¼ cup unsalted butter
- 1 tablespoon all-purpose flour
- 3 tablespoons granulated sugar
- 1 large egg
- 1 large egg yolk
- ½ teaspoon vanilla extract
- Pinch of salt
- Powdered sugar, for dusting
- Fresh berries and mint leaves, for garnish (optional)
Instructions:
- Preheat your oven to 425°F (220°C). Butter and lightly flour two 6-oz ramekins.
- In a microwave-safe bowl, combine the chocolate and butter. Microwave in 30-second intervals, stirring between each, until melted and smooth.
- In a separate bowl, whisk together the flour, sugar, egg, egg yolk, vanilla extract, and salt.
- Gradually fold the chocolate mixture into the egg mixture until well combined.
- Divide the batter evenly between the prepared ramekins.
- Place the ramekins on a baking sheet and bake for 12-14 minutes, until the edges are set but the centers are still soft.
- Remove from the oven and let stand for 1 minute.
- Run a knife around the edges to loosen, then carefully invert each cake onto a serving plate.
- Dust with powdered sugar and garnish with fresh berries and mint leaves if desired.
- Serve immediately.
The key to perfect lava cakes is timing—you want the edges set but the center still gooey. I recommend doing a test run before Valentine’s Day if you’ve never made them before. Also, these cakes can be prepared in advance and refrigerated until you’re ready to bake them, making them ideal for a stress-free Valentine’s dinner.
Heart-Shaped Strawberry Hand Pies
When I want to combine the charm of Valentine’s Day with nostalgic comfort, these hand pies are my go-to recipe. The heart shape makes them undeniably festive, while the strawberry filling provides a natural pink hue that’s perfect for the occasion. They’re portable, not too messy, and can be enjoyed warm or at room temperature.
Ingredients:
For the crust:
- 2 ½ cups all-purpose flour
- 1 tablespoon granulated sugar
- 1 teaspoon salt
- 1 cup cold unsalted butter, cubed
- ¼ to ½ cup ice water
For the filling:
- 2 cups strawberries, hulled and diced
- ⅓ cup granulated sugar
- 1 tablespoon cornstarch
- 1 tablespoon lemon juice
- ½ teaspoon vanilla extract
For assembly:
- 1 large egg, beaten (for egg wash)
- 2 tablespoons coarse sugar, for sprinkling
- Optional: pink or red food coloring for the crust
Instructions:
- For the crust: In a food processor, pulse together flour, sugar, and salt. Add butter and pulse until mixture resembles coarse meal.
- Add ice water gradually, pulsing until dough just comes together.
- Divide dough in half, form into disks, wrap in plastic, and refrigerate for at least 1 hour.
- For the filling: In a saucepan, combine strawberries, sugar, cornstarch, and lemon juice. Cook over medium heat until thickened, about 5-7 minutes.
- Remove from heat, stir in vanilla, and allow to cool completely.
- Preheat oven to 375°F (190°C) and line baking sheets with parchment paper.
- On a floured surface, roll out one disk of dough to about ⅛-inch thickness.
- Use a heart-shaped cookie cutter to cut out shapes (approximately 3-4 inches in size).
- Place 1-2 tablespoons of filling in the center of half of the heart shapes.
- Brush the edges with egg wash, then top with remaining heart shapes.
- Press edges with a fork to seal, then brush tops with egg wash and sprinkle with coarse sugar.
- Cut a small vent in the top of each pie.
- Bake for 20-25 minutes, until golden brown.
- Allow to cool slightly before serving.
I’ve found these hand pies to be particularly popular at Galentine’s gatherings. They’re casual enough to eat without fancy dinnerware but special enough to feel like a true Valentine’s treat. If you’re feeling extra creative, you can add a drop of pink or red food coloring to half of your pie dough for a two-toned effect.
Comparison of Valentine’s Day Dessert Recipes
For those trying to decide which dessert best fits their Valentine’s plans, I’ve created this helpful comparison table:
| Recipe | Prep Time | Bake/Chill Time | Difficulty | Make Ahead? | Special Equipment | Best For |
|---|---|---|---|---|---|---|
| Matcha Crinkle Cookies | 20 mins (plus 2 hrs chilling) | 10-12 mins | Easy | Yes, dough can be made 2 days ahead | None | Cookie exchanges, gifting |
| Red Velvet Cheesecake Brownies | 25 mins | 30-35 mins | Medium | Yes, up to 2 days ahead | 8×8 baking pan | Romantic dessert for two |
| Raspberry White Chocolate Mousse Cups | 30 mins | 3+ hrs chilling | Medium | Yes, up to 24 hours ahead | Fine-mesh sieve, serving glasses | Elegant dinner finales |
| Chocolate Lava Cakes | 15 mins | 12-14 mins | Easy-Medium | Yes, unbaked batter can be refrigerated | 6-oz ramekins | Impressive date night dessert |
| Heart-Shaped Strawberry Hand Pies | 45 mins (plus 1 hr chilling) | 20-25 mins | Medium-Hard | Yes, up to 24 hours unbaked | Heart-shaped cookie cutter | Casual gatherings, portable treats |
Valentine’s Dessert Serving Suggestions
Creating the right atmosphere for your Valentine’s dessert can make the experience even more special. Here are some of my favorite serving suggestions:
- For Matcha Crinkle Cookies: Arrange on a vintage cake stand with fresh strawberries scattered around. Serve with hot tea or a creamy hot chocolate.
- For Red Velvet Cheesecake Brownies: Cut into heart shapes using a cookie cutter (if feeling ambitious). Serve on white plates with a dusting of powdered sugar and fresh raspberries.
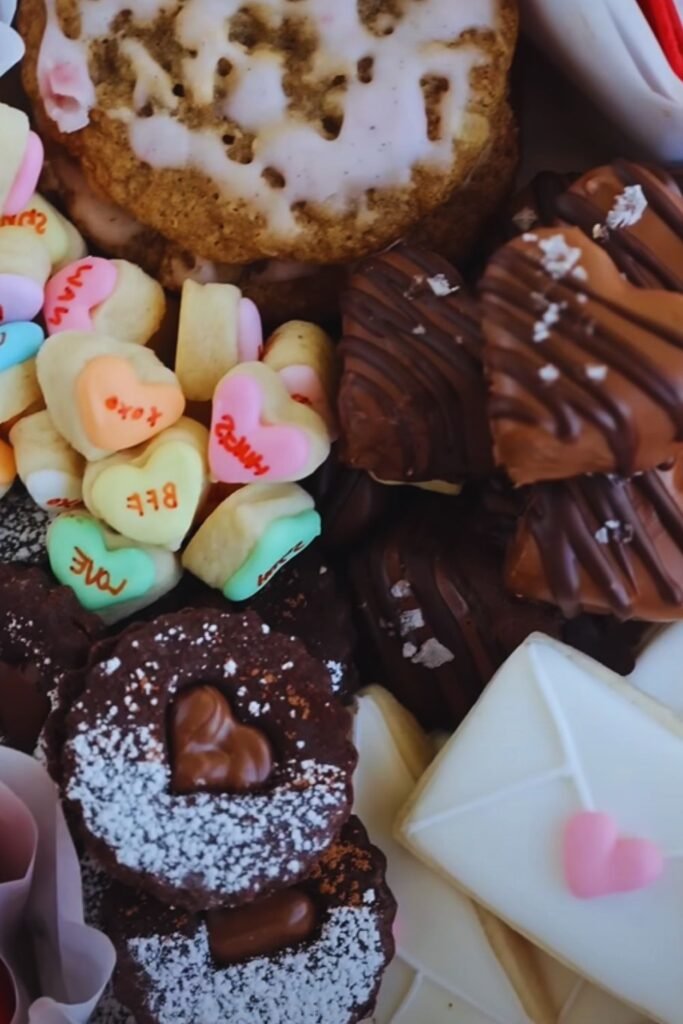
- For Raspberry White Chocolate Mousse Cups: Create a dessert board with the mousse cups as the centerpiece, surrounded by fresh berries, chocolate-dipped strawberries, and small cookies.
- For Chocolate Lava Cakes: Serve immediately after baking on warmed plates. Add a scoop of vanilla ice cream or a dollop of whipped cream that will melt beautifully over the warm cake.
- For Heart-Shaped Strawberry Hand Pies: Display on a tiered stand with fresh flowers between levels. A light dusting of powdered sugar just before serving adds an elegant touch.
For drinks, consider sparkling water with fruit, a rose-infused lemonade, or a frothy coffee drink with heart-shaped cocoa powder stenciled on top.
Tips for Valentine’s Day Baking Success
My years of Valentine’s Day baking adventures have taught me a few valuable lessons:
- Read the full recipe before starting: Nothing dampens the Valentine’s mood faster than realizing halfway through that you need to chill a dough for hours or are missing a crucial ingredient.
- Prep ingredients in advance: Measure everything out before you start mixing. This “mise en place” approach makes the process more enjoyable and less frantic.
- Consider your audience: Is your Valentine a chocolate lover? Do they prefer fruity desserts? Choose recipes that cater to their preferences.
- Plan for timing: Some recipes (like the mousse cups) need significant chilling time, while others (like the lava cakes) must be served immediately after baking.
- Embrace imperfection: Homemade treats have personality! A slightly lopsided heart or uneven swirl adds charm and shows the dessert was made with love.
- Add personal touches: A simple handwritten note or custom decoration can transform a good dessert into a memorable Valentine’s experience.
- Have a backup plan: If disaster strikes (it happens to everyone occasionally), have some quality chocolate or store-bought treats on hand as a Plan B.
Dietary Adaptations
Love comes in all forms, and so do dietary needs. Here are modifications for common dietary restrictions:
Gluten-Free Adaptations:
- Matcha Crinkle Cookies: Substitute all-purpose flour with a 1:1 gluten-free flour blend.
- Red Velvet Cheesecake Brownies: Use gluten-free flour and ensure your cocoa powder is certified gluten-free.
- Raspberry White Chocolate Mousse Cups: Naturally gluten-free! Just check that your white chocolate doesn’t contain gluten additives.
- Chocolate Lava Cakes: Substitute the tablespoon of flour with almond flour or a gluten-free blend.
- Heart-Shaped Strawberry Hand Pies: Use a gluten-free pie crust recipe or pre-made gluten-free pie crust.
Vegan Adaptations:
- Matcha Crinkle Cookies: Use vegan butter, flax eggs (1 tablespoon ground flaxseed mixed with 3 tablespoons water equals one egg), and ensure your sugar is vegan.
- Red Velvet Cheesecake Brownies: Use vegan butter, flax eggs, and vegan cream cheese. Increase the cocoa powder slightly to compensate for the different texture.
- Raspberry White Chocolate Mousse Cups: Substitute heavy cream with full-fat coconut cream, use vegan white chocolate, and agar-agar instead of gelatin.
- Chocolate Lava Cakes: These are challenging to make vegan while maintaining the lava center. Consider a vegan chocolate cake with warm ganache poured in the center as an alternative.
- Heart-Shaped Strawberry Hand Pies: Use vegan butter or shortening in the crust and brush with plant milk instead of egg wash.
Q&A Section
Q: Can I make any of these desserts ahead of time?
Absolutely! The matcha crinkle cookie dough can be refrigerated for up to 3 days before baking. Red velvet cheesecake brownies can be made 2 days ahead and stored in an airtight container. The raspberry white chocolate mousse cups are perfect for making ahead—they need at least 3 hours to set anyway. For lava cakes, you can prepare the batter and refrigerate it in the ramekins for up to 24 hours before baking (you may need to add 1-2 minutes to the baking time). The hand pie dough can be made 3 days ahead, and assembled pies can be refrigerated unbaked for 24 hours.
Q: I’m not confident in my baking skills. Which recipe is the most foolproof?
The matcha crinkle cookies are very forgiving and hard to mess up, making them perfect for beginners. The chocolate lava cakes are surprisingly simple too, though timing is crucial—just remember that slightly underbaked is better than overbaked when you want that molten center.
Q: How can I make these desserts look more Valentine’s-themed?
Easy additions include: heart-shaped sprinkles, pink or red food coloring in white chocolate drizzles, edible rose petals as garnish, or simply arranging fresh strawberries or raspberries around your dessert. You can also use heart-shaped cookie cutters for brownies or cookies, or pipe whipped cream in heart shapes.
Q: What if I can’t find matcha powder for the crinkle cookies?
While the vibrant green color is part of their charm, you can substitute with other flavors. Try using cocoa powder for chocolate crinkles, or a bit of strawberry powder for pink ones. The texture will be the same, just with a different flavor profile.
Q: Can I use frozen berries instead of fresh for the raspberry mousse or strawberry hand pies?
Yes! For the mousse, thaw and drain frozen raspberries before using. For the hand pies, frozen strawberries actually work wonderfully—just thaw, drain excess liquid, and proceed with the recipe. In fact, frozen berries are often more consistent in flavor when fresh ones are out of season.
Q: My partner doesn’t like chocolate. Are there alternatives?
The matcha cookies and strawberry hand pies are excellent non-chocolate options. For the raspberry mousse cups, you can omit the white chocolate and increase the gelatin slightly (add an extra ½ teaspoon) to maintain the proper setting. You might also consider a vanilla bean panna cotta with berry coulis, or a fruit tart with pastry cream.
Q: How do I know when my lava cakes are done but still have the liquid center?
This is the trickiest part! The edges should be firm and set (about 1 inch in from the edge), while the very center should still look slightly underdone and soft. If you gently touch the top, it should spring back around the edges but feel soft in the center. Start checking at the minimum baking time to avoid overcooking.
Valentine’s Day desserts don’t need to be complicated to be memorable. The most important ingredient is the thought and care you put into making something special for someone you love—even if that someone is yourself! I hope these recipes bring some sweetness to your Valentine’s celebration this year.